Nikon D7200 body Instrukcja Obsługi
Strona 142
Advertising

118
3
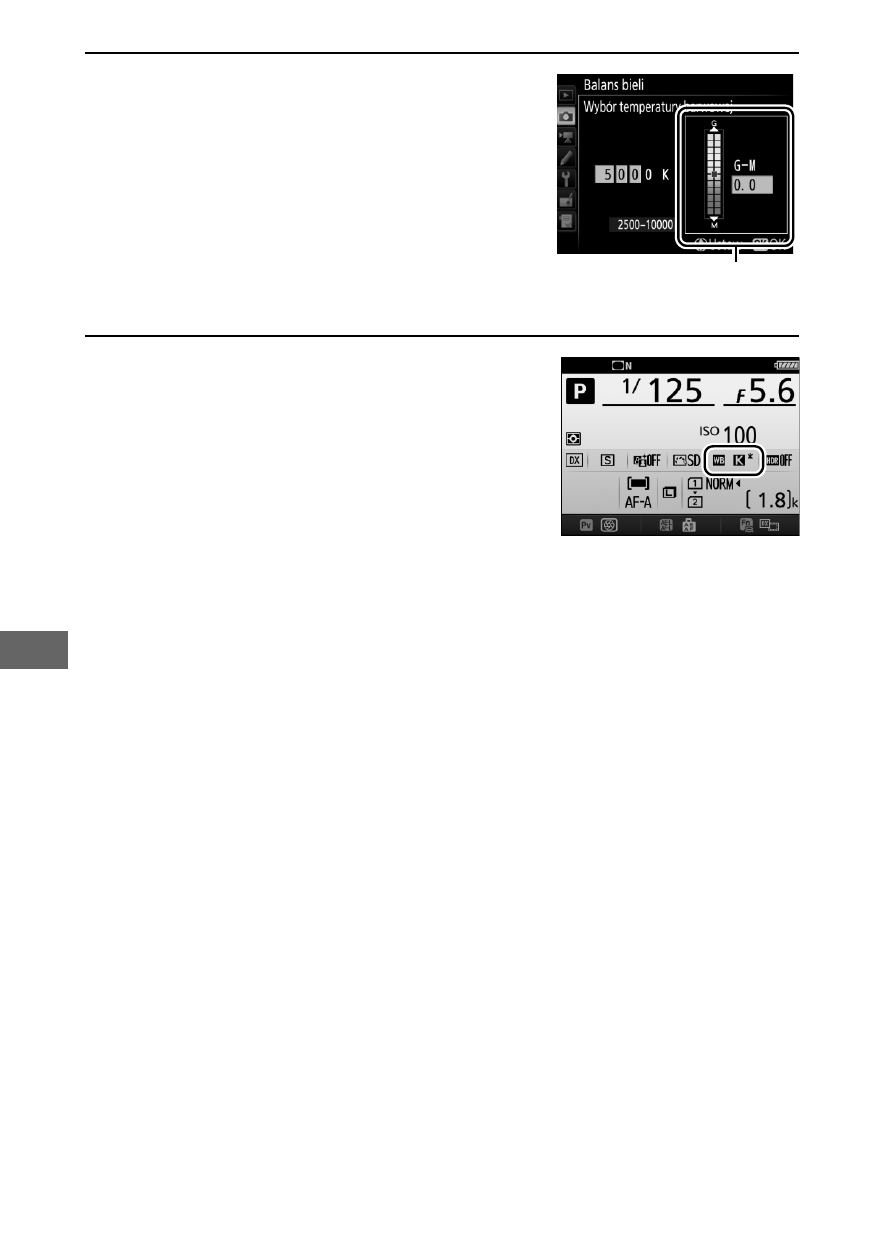
Wybierz wartość dla osi barw zielonej-
magenty.
Naciskaj
4 lub 2, aby wyróżnić oś
G (barwy zielonej) lub M (magenty),
a następnie naciskaj
1 lub 3, aby wybrać
wartość.
4
Naciśnij
J.
Naciśnij
J, aby zapisać zmiany i powrócić
do menu fotografowania lub menu
nagrywania filmów. Jeśli dla osi barw
zielonej (G)–magenty (M) wybrana została
wartość inna niż 0, obok ikony
K pojawi się
gwiazdka („
E”).
Wartość dla osi zielony (G)–
magenta (M)
Advertising
Zobacz także inne dokumenty w kategorii Kamery Nikon:
- D800 (Stron: 472)
- D300 (Stron: 452)
- D80 (Stron: 162)
- D200 (Stron: 221)
- D40X (Stron: 139)
- D60 (Stron: 204)
- D40 (Stron: 139)
- Coolpix S3000 (Stron: 184)
- Coolpix L110 (Stron: 156)
- D50 (Stron: 148)
- D700 (Stron: 472)
- COOLPIX-P100 (Stron: 216)
- COOLPIX-S8100 (Stron: 220)
- D90 (Stron: 300)
- D3000 (Stron: 216)
- D5000 (Stron: 256)
- D3100 (Stron: 224)
- D300s (Stron: 432)
- COOLPIX P500 (Stron: 252)
- Coolpix L3 (Stron: 120)
- Coolpix L18 (Stron: 124)
- Coolpix S1 (Stron: 110)
- Coolpix S550 (Stron: 164)
- Coolpix S4 (Stron: 108)
- Coolpix S560 (Stron: 172)
- Coolpix P2 (Stron: 183)
- Coolpix P60 (Stron: 144)
- Coolpix L19 (Stron: 140)
- Coolpix P90 (Stron: 192)
- Coolpix S600 (Stron: 144)
- Coolpix L100 (Stron: 148)
- D2Xs (Stron: 288)
- Coolpix P4 (Stron: 137)
- Coolpix L4 (Stron: 112)
- Coolpix L12 (Stron: 144)
- D3 (Stron: 480)
- Coolpix L14 (Stron: 128)
- Coolpix S4300 (Stron: 224)
- Coolpix P6000 (Stron: 220)
- Coolpix P80 (Stron: 168)
- Coolpix L810 (Stron: 216)
- Coolpix S620 (Stron: 164)
- Coolpix L11 (Stron: 135)
- Coolpix S700 (Stron: 148)
- Coolpix S520 (Stron: 156)